Ever found yourself sitting around looking at that slow computer, debating whether it is worth opening up to make it faster? Perhaps you are stressing out over the prospect of installing something similar to a 35-ds3chipdus3, since “chips” and “pins” are not very comforting terms.. But guess what? If you can wield a screwdriver and follow a checklist, you can absolutely install this chip. Let’s talk real: Outdated hardware slows you down, but shelling out for a new gadget is tough. Upgrading with the 35-ds3chipdus3 is where the magic happens—it’s affordable, practical, and totally doable even if your tech skills top out at “turn it off and on again”.
Why Everyone’s Curious About How to Install 35-DS3CHIPDUS3
It’s true – we’re all just trying to get a little more out of our hardware. Why not start here:
- Faster boot and load times (We’re all sick of the spinning wheel.)
- Better energy efficiency (Less heat, more chill.)
- Do-it-yourself savings (Who needs a pricey upgrade when a chip will do?)
- Future-proofing (Run new software without lags or tears.)
What Even Is 35-DS3CHIPDUS3? (Skip if You’re Already a Fan)
It’s an awesome little boost—it’s like giving your motherboard a jolt of adrenaline. Perfect for computers, game consoles, and those gadgets that still think it’s 2012. I always tell friends: give your machine some love before chucking it on eBay—this chip’s ideal for just that.
Understanding 35-DS3CHIPDUS3 Version
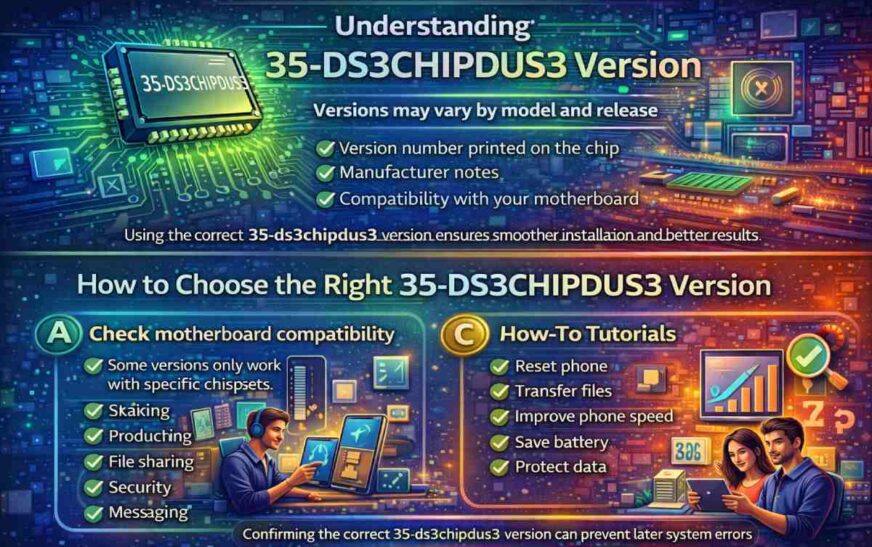
Before installing, it’s important to know that the 35-ds3chipdus3 version can vary depending on the model and release. Different versions may have small changes in compatibility, firmware requirements, or performance behavior.
Always check:
- Version number printed on the chip
- Manufacturer notes
- Compatibility with your motherboard
Using the correct 35-ds3chipdus3 version ensures smoother installation and better results.
How to Choose the Right 35-DS3CHIPDUS3 Version
Not all systems support every 35-ds3chipdus3 version, so choosing the right one is important.
Here are a few simple tips:
- Check motherboard compatibility – Some versions only work with specific chipsets
- Look at firmware requirements – Newer versions may need updates before installation
- Avoid mixing versions – Using the wrong version can cause system errors or poor performance
- Start with stable versions – If you’re unsure, go with a commonly used or recommended version
Taking a few minutes to confirm the correct 35-ds3chipdus3 version can save hours of troubleshooting later.
Prepping for Installation (Or: How Not to Panic)
Before you dive in, get these basics lined up:
- Compatible motherboard (Not all sockets are created equal!)
- Precision screwdriver set (Put down the butter knife.)
- Anti-static wrist strap (Static is a sly one.)
- Thermal paste (For optimal cooling. If unsure, grab a fresh tube.)
- User manual (Trust me, keep it close.)
- Firmware update on USB (Some versions demand it—check those release notes.)
- A clean, clutter-free work area (Less clutter, less stress.)
Sprinkle in some patience—everyone messes up their first install. I’ve dropped screws inside cases before; it happens!
Step-by-Step: How to Install 35-DS3CHIPDUS3
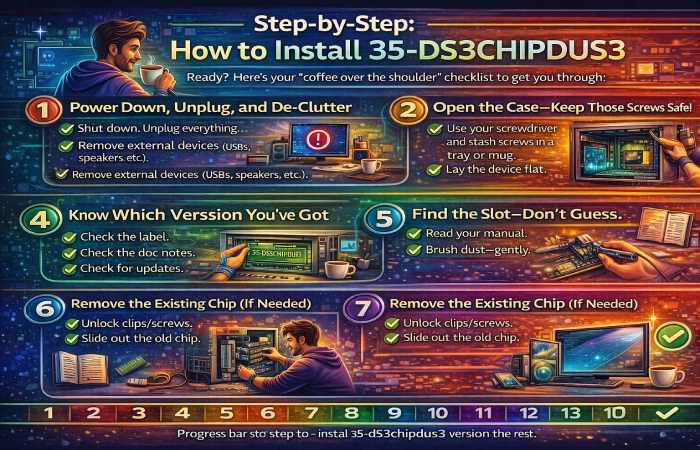
Ready? Here’s my “coffee over the shoulder” checklist to get you through:
1. Power Down, Unplug, and De-Clutter
- Shut down. Unplug everything. No “I’ll just leave it plugged in…” Trust me!
- Remove external devices (USBs, speakers, etc.).
2. Open the Case—Keep Those Screws Safe!
- Use your screwdriver, pop the cover, and stash the (tiny) screws in a tray or mug.
- Lay the device flat—nobody wants a gravity-fueled disaster mid-install.
3. Ground Yourself/Protect the Chip
- Clip on that anti-static wrist strap. Better safe than frying the chip.
4. Know Which Version You’ve Got
- Look at the label or documentation provided—you’ll find that each model version has its own set of problems. Some models need to be updated with firmware before use. Each model version has its own set of problems. Some models need to be updated with firmware before use.
5. Find the Slot—Don’t Guess
- Your manual is your best pal. Most slots are labeled, usually beside the processor or memory.
- Brush away dust (gently!).
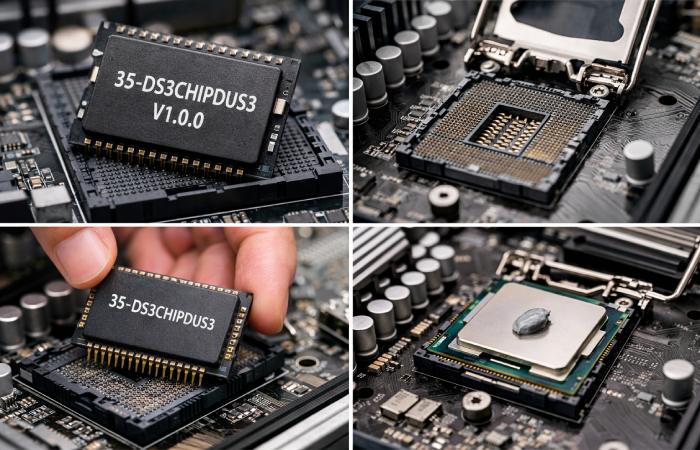
6. Remove the Existing Chip (If Needed)
- Unlock clips/screws on the old chip. Slide it out; never yank.
7. Align and Insert the 35-ds3chipdus3
- Line up notches—this is all about finesse, not muscle.
- Gently press down till you hear a click or hit resistance. Never jam!
8. (Optional) Apply Thermal Paste
- If your CPU requires a heatsink, use a small dab of thermal paste. Spread it evenly to cover the entire surface.
9. Secure Everything and Close Up
- Lock in the chip (clips/screws). Replace the case. Tighten screws but don’t overdo it—you want to open it again someday, right?
10. Power On and Watch Closely
- Plug in. Switch on. Watch and listen: any weird noises or error lights? If it boots, you’re golden!
Post-Installation To-Dos
Your hardware’s in—now wrap up like a pro:
- Install latest drivers from the manufacturer (this gets overlooked a lot—don’t skip it!)
- Run a system benchmark (try Geekbench or CPU-Z) to see just how much faster you’ve gotten.
- Monitor temps and performance—especially the first week. If fans go wild or heating spikes, check your install.
Also confirm that your system correctly detects the installed 35-ds3chipdus3 version in system settings or BIOS.
Troubleshooting—Because Stuff Happens
If you hit a snag, here’s my go-to quick fixes:
Because Stuff Happens
| Problem | Fix |
| Device won’t start | Reseat chip, check connections, redo steps |
| Performance is still sluggish | Double-check driver installs and updates |
| Overheating | Clean fans, ensure heat sink contact |
| Not detected by system | Check slot, update firmware/drivers |
| System freezes | Try reinstallation, check compatibility |
| Chip not compatible | Check if correct 35-ds3chipdus3 version is installed |
Maintenance—Don’t Set and Forget
Here’s how to keep things humming along:
- Update drivers monthly
- Clean out dust (compressed air, every 2 months)
- Run benchmarks each quarter—catch issues early
- Scan for malware (less load = longer device life)
Real Stories: Why I’d Recommend Installing the 35-ds3chipdus3
I’ve upgraded three old desktops and a gaming console with this chip. Each one turned from laggy to lively. My old work PC? What was once a coffee-fetching boot time now gets through startup before I get to my chair.
One More Thing—Feeling Nervous Is Normal
If you’re reading this just to psych yourself up: nearly everyone (including me!) worries about cracking open their first system. But if you prep right, follow each step, and stay patient, you’ll join the ranks who say, “Should’ve done this sooner!” Every step in how to install 35-ds3chipdus3 becomes easier the second time around. Remember, you’re never on your own—you always have a friend like me around to assist you.
So, if you desire speedier loading times, a decrease in temperature, and new life for your gadget, learning about how to install 35-ds3chipdus3 will be the upgrade you will regret not doing earlier.
learning about how to install 35-ds3chipdus3 will be the upgrade you will regret not doing earlier. Choosing the right 35-ds3chipdus3 version is equally important for best performance.
For general PC hardware safety and installation basics, you can refer to Intel Support